Thursday, November 13, 2014

Old Magazines

Hello there,
I was flipping through some old "CardMaker" magazines the other day, and some of the featured cards were just WOW! to me. They never really get old, do they? The colors and even the stamps seemed as fresh as today. This particular magazine was from 2009 (that's 5 years ago!) and it had multi-media; embossing folders, lots of the color orange...and many other features that we still use today.

There has been a lot of products added in the last five years and we love them...it's always fun to get something new to play with...but it was really fun to look back and see that we still love beautiful papers, beautiful stamps and great design. They never really get old. A beautiful card is a beautiful card!!! 

But we have LEFTOVERS!!! LOTS OF LEFTOVERS!!!
So I am making a commitment: Use something from my stash on EVERY project I make.  Every time we buy something, it usually comes as a pack of several items. I think that most crafters will never use up every item that they fell in love with and and then had leftovers that went in storage, and stayed there.

I ASK YOU: Do you have an idea of how to share your stash OR use more of your stash so that you don't have to feel guilty about having so much "STUFF"???

All right...here is the card I made from one of the old magazines I was looking through. I picked out several to "copy" and I will show you my take on those later. I loved this first one because of the color: orange and GOLD. I had not done that combination before and I really liked it.


I had a paper that I loved but had never found anything to use it on. It was pink and gold and I knew it would be perfect. I used Distress "Orange Marmalade" to marble the paper and it came out perfect.

The next thing was to apply some white acrylic paint down the side (you can't see that too much) and also along the bottom and up on the other side a little bit.

I also used some leftover pieces of paper that I cut into strips to place on the side to give the card some interest and cut a leaf sprig with my Cuttlebug. I LOVE my Cuttlebug and my Cameo. Don't know what I would do without them. That flourish is from my Cameo files. There are so many flourishes on their site that picking one is really difficult. The flourish is covered with gold Wink of Stella.
Wink of Stella is my new toy and I absolutely love it!!!

Hope you enjoyed your stop here and leave me a note...I would love to hear from you.

I am entering this card in these challenges:
https://www.facebook.com/groups/TresorsdeLuxeChallenge/ tic tac toe
http://inkspirationalchallenges.blogspot.com/ shine


I'll be back soon, till then

Be Blessed!!!


Wednesday, October 29, 2014

For the love of a new stamp....

Hello there,
Welcome to my blog...I am so excited today!!! 
I went to a stamping party a couple of weeks ago and ended up buying a stamp that I "kind of" liked but wasn't sure about. I had not picked out anything I wanted to buy ahead of time and making a decision on the spur of the moment was difficult. The stamp was delivered a couple of days ago and the moment I saw it "for real" I couldn't wait to use it!!!

It was exactly what I had been seeing on other designers' blogs but didn't have anything like it for myself. The stamp is called "White Christmas" by SU! and it has all these little images of bare winter trees, a car, a polar bear, a deer, snowman, birds, etc. I think I'll have lots of fun with this one.

So this is my first card with this stamp. I envisioned this card from one I saw by Birgit on Penny Black's blog ...Birgit's cards are absolutely my favorites right now...I love everything about them. She is an awesome designer.


I cut the card base from Neenah White Solar cardstock long way to open at the bottom
        4 1/4" across and 5 1/2" down.
I cut a curvy line in the middle of a 4 1/4" x 5 1/2" of a separate piece of  Neenah                       cardstock using a guideline I had from a long time ago.
Then I used a watercolor paper 4 1/4" across and 4" down to make my "window" scene.
I painted the sky with my "Peerless" watercolors. The colors worked together just                        beautifully.
I added white dots of "snow" with a white pen.
Stamped the trees and used clear and silver "Wink of Stella" pens to add a little glitter.
          I CANNOT make a card without glitter!!!!
I stamped the bear, snowman and cardinal on separate glitter cardstock (you can't see the             beautiful cardstock, the images are just too small, but I know it's there!)

So there you have it...
THANKS FOR SHARING IN MY FUN!!!
Making ART is such a fun addiction!!!

I am entering these challenges:
http://www.fashionablestampingchallenges.com/ weather forecast
http://addictedtostamps-challenge.blogspot.ca/ anything goes CAS
http://countryviewchallenges.blogspot.co.uk/ sparkle and shine

Be back soon!!!

Saturday, October 25, 2014

Hello FALL....

Amazing, isn't it?
Days, weeks and months pass by so quickly, and here we are...summer is gone and Fall is fast upon us. The colors of Fall are so beautiful, yellow, orange and rusty reds...ahhh if only the temp would stay in the 60's and 70's, I'd be HAPPY!!!

It's good to be back here on the blog again.
It's been a VERY long healing journey for my husband (see previous post).
We are finally at the place where he can run small errands, help with some chores, and start feeling like a whole person again. And me too...I have resumed the two Bible Studies I have, enjoying lunch with friends now and then, and WALKING MY DOG!!!
God has showered us with His GRACE to get through this and I know beyond a shadow of a doubt that this journey we are on is in His hands. That doesn't mean it's not difficult, but it does mean that He is LORD OF ALL in our lives and He is overseeing every bit of the process...

I am still not in full swing of my crafting time but I am working hard to find the time to sit at my desk and CREATE!!! I am sure you know how it is...ideas and images run around in our heads and we just NEED TO PUT SOMETHING ON PAPER!!!
Well, here is the first card I made with a stamp I won last year from                                     The card didn't turn out quite how I wanted it...but it was fun to do and I found the two little gingerbread people in my stash of "metal things" that I hoard. I LOVE METAL but don't seem to use it nearly as much as I would like. I don't even know where these two little people came from...but I know that I have had them a looong, looong time.

So, here's my card...


I used a Tim Holtz stamp on the background (in yellow marmalade), I love that stamp!
My main image is colored with Tombow markers with the addition of gold and silver.
The bow is hemp cord and a red piece of yarn from my stash.
That "Greetings and Kind Thoughts" is from 

I am entering this card into these challenges:

Thanks for stopping by...
Have a wonderful weekend

Elena

Sunday, July 20, 2014

A multi-media canvas...

Well hello there,
So glad to be back on the blog AND most of all, to have had the opportunity to actually start and finish this project!!! I knew EXACTLY what I wanted to do because I absolutely HAD to make a wall hanging to remember God's Word for this journey He put us on.

So here's the story: We drove to Virginia Beach for our vacation in June. Our granddaughter was graduating from high school, our youngest grandson had just celebrated his 9th Birthday and we had not seen them since October. But most of all IT WAS TIME TO WALK THE BEACH!!!! And we WALKED the beach...almost every day!!! 

Two weeks later, when we got home, my husband realized there was something wrong with his foot. It was swollen and red all the way up to his knee...Soooo, to the doctor...two days later, to the hospital...all because of the ONE time he took his shoes off at the beach and a tiny stone embedded into his foot and, being a diabetic, he didn't feel a thing!!! He was in the hospital SIX DAYS...Now he is home with an intravenous antibiotic and a wound that I dress 2x per day.

What a shocker...couldn't believe it!!! I felt AWFUL because I am the one who encouraged him to take his shoes off so that he could run around with me and the grandkids and play in the sand...it was fun!!! YES!!! Was it worth his health???? NO!!! But we didn't know...and God allows things into our lives when we least expect it.

Our life was changed...Not only was my husband in the hospital, I lost my job at the same time. The ministry I worked for had to cut back because of finances..it's the economy we live in. All of a sudden, everything was different.  Hubby's health, our finances, everything seemed to have exploded and it was all whirling around us. But we knew GOD was in control. He was not going to let us drown, nor were we going to be swept away by the overwhelming swirl of our circumstances!!! 

God is going to see us through...we KNOW that!!! We hung on to Him and allowed Him to love us, comfort us, teach us, wrap us in His warm arms and give us PEACE!!!  He is faithful to bring His promises to fruition. He is faithful to give us everything we need for that moment. He is faithful to be our Father, our Savior, our provider, our EVERYTHING!!! 

So here's my canvas for my wall...it will hang right next to my scrapbooking desk, so that I
can look at it and read it whenever I forget that the journey we are on is given to us by HIS hand and is designed especially for us.


I saw an l.o. pretty much like this by Jennifer Snyder on her blog :http://scrap-escape.blogspot.com/ I was so taken with the layout that I knew I wanted to make one like it. It fit everything that was my story. Please click on the link above to see all her wonderful work.

For my canvas I took a used picture that had been in storage and covered it with gesso to hide the previous work. I used LuminArte' watercolor paints to cover the whole canvas in different shades of blue. I liked the way the watercolors left many brush marks and had the look of fluidity (water) for the background. I wanted it to look like the sea.

Then I used two different stencils and coated them with white texture paste. Because I was working with watercolors, the paste picked up some blue and didn't stay pure white. That was a nice surprise because it muted and looked like it all went together. I didn't think about paste getting colored by the watercolors, but I will sure remember that from now on.

The doll is a pattern that was on Gabrielle Pollacco's blog several years ago. It was before Julie Nutting came out with her doll stamps and Gabrielle featured her doll on a layout. So she included the pattern on her blog. The pattern worked very easily and I was able to shrink it down so that the doll fit on my 8x8 canvas.

The white seafoam is bandage material that I pulled and shaped and applied Glossy Accents topped with white and blue seed beads. I also used brown mesh to look like sand. That was really hard to pull out...it was not very pliable...but it worked. All of the shells are my own that I collect from every place we visit that has water and shells. The colored, large shiny beads are from my stash and so is the green resin shell on the side.

The hanging beads are from my stash but the blue crystal is from Germany that I received when my friend died from tuberculosis. It was hers and her Mom gave it to me because we were such close friends. We were both only about 7 years old. I will always treasure that and I am happy to have found a place to show it off.

So that's about it...I know this is a long post, but thank you for allowing me to share this part of my story...sometimes we just need to share.

I am entering this into these challenges:
http://wordartwednesday.blogspot.com/ Anything goes...with scripture
http://www.colorthrowdown.blogspot.com.au/ colors of calypso coral (the coral bead); crumb cake (a few shells, girl's dress); smoky slate (gray shell & several beads); soft sky (shades of blue on background, beads in the seafoam)
http://berry71bleu.blogspot.com/ Use at least three patterns (several patterns in the dress, many patterns on the shells)
http://scrap-the-girls.blogspot.com/I LOVE the name of this challenge: paint and texture paste (got this one...paint on the background and texture paste through several stencils)
http://pileitonchallenge.blogspot.com/ summer fun
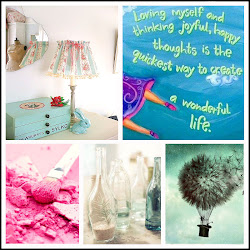
http://scraparoundtheworld.blogspot.com.au/2014/07/july-2014-challenge-15-light-airy-mood.html I was deeply inspired by the beautiful blue color and the pink...I love mood boards AND this challenge site.ENTRIES CLOSE 23.55 EST THURSDAY 31ST JULY 2014

Many blessings,

elena

Tuesday, June 3, 2014

Playing with Mo's Digis...

Good morning everyone!!! (It's morning here anyway)
Ohhhh, it's been a long while since I have written.
Will I ever get in the groove of posting my craft????
I love, love, LOVE making pretty cards and working on my pages, but getting them into the blog is just hard for me. I think, for me, posting on a schedule would work...going to have to give that a good try!!!

So, I have been reading all your blogs and I am so inspired by the beautiful ideas all of you come up with. God has blessed us with such wonderful talent and for those of us who love to ooh and aah at other people's work, there is much to admire. I am just awed by the products and the new ideas that are constantly coming up on the market, the biggest challenge is not to spend more on our art than we do on food!

So on to my card. I have jumped wholeheartedly on the watercolor bandwagon. I've always loved the look of watercolors but never thought that I could actually do it. Now, with the use of stamps...it's so EASY...AND ENJOYABLE!!! I used an image from Mo's digis... http://mosdigitalpencil.com/I just love her art!!!don't you??? it's so FUN!!!
This card is for our granddaughter's birthday and I wanted an image that just epitomized who she is...well, this was PERFECT!!!


I have bought the Tombow Dual Brush watercolor markers, and I am really happy with them. It certainly takes practice to have the images come out beautiful, but they're ok even as I work on them. I took the watercolor card class with Jennifer McGuire and others. It was AWESOME!!! and really taught me a lot. But it still takes a lot of actual painting to perfect my art. But I am happy to play with my markers. My goal is to be able to watercolor with stamps and have it look like the image was not stamped at all...that's in the future!!!

As you can see, the image is simple watercoloring, and I used my Cameo to cut the words out. The circles are from a packet I picked up somewhere a while ago. It's very simple, I know, but perfect for my girl.

I have entered this card in the following challenges:
http://www.simonsaysstampblog.com/wednesdaychallenge/
http://words2scrapby.blogspot.com/
http://mosdigitalchallenge.blogspot.com/

That's it for me today,
Come and enjoy my journey with me and leave me a little word about yourself, I'd love to know you were here.

Blessings,
 elena

Sunday, March 16, 2014

A shaped tag

Hello everyone,
Spring is beginning to arrive here...ever so slowly (2 degrees below zero tonight they tell us) but it's getting sunny now and we get up to mid 30s...and have even hit 40 this last week.  It feels so wonderful to feel the sun and  the warmth. I know, it's not that warm to some of you who live in the warmer climates, but for us here in these colder states...40 is AWESOME!!!

I love tags, and I had seen a set on one of the sites that I visit...I thought it was awesome. It was cut in a shape instead of just being a rectangle. And also it was EMBOSSED IN POLKA DOTS. I loved it!!!
So, I had to make some too. I don't like my shape as well as the one I saw, I'll have to try a different one from the Cameo designs. But it looks good and they came out nice anyway.

Here's the tag:


I colored this one in lime green, with darker edges.
Then I stamped it with a Hero Arts postcard stamp in StazOn dark brown ink.
I added some darker green stamping along the left edge. I knew it would be covered anyway, but it gives some interest if there is any of it sticking out underneath the embellishments.
I used my CuttleBug and a Swiss Dot folder to dry emboss the tag. It didn't cover the whole tag, so instead of trying to match up the embossing, I left it bare and used that spot to show off the antique car.

All those little dots are covered with white acrylic paint because I wanted them to really show up from the green. It really wasn't much of a job, I just dipped the wood end of a small brush into a glob of paint and touched the top of each dot. A few of them got a little more paint than they should have, but when it's all together it really doesn't show very much.

The embellishments started out with a some leaves, flourishes, eyelash yarn and other stuff I had around.
The leaves and flourishes are die cuts with my Cameo.
The butterfly and that beautiful circle are Memory Box dies.

I love that little car. I bought the stamp from a friend who wasn't using it and I was just waiting for a chance to use it somewhere. This seemed like the perfect place for it. And that red polka dotted paper is from a cheap $1.00 jewelry card that a necklace was attached to. I buy cheap jewelry to use in my scrapbooking whenever I see something that I like. I am sure we all do that.

Challenges I entered:
http://gloriadesignschallenge.blogspot.co.il/ Vintage or Retro
http://cutitupchallenges.blogspot.com/ Green or St. Pat's Day with a die cut
http://www.flonzcraft.com/vsc/ Just for you...The red car for my journey
http://berry71bleu.blogspot.com/ Luck of the Irish green
http://countryviewchallenges.blogspot.co.uk/ Paper chase (lots of paper)
http://cateredcrop.com/ Spring colors

Saturday, March 1, 2014

Cutting with my Cameo...

Hello everyone in blogland,
It's been a while again, but I have missed sharing my little scrapping space with you all.
I've been down with migraines again and that makes it very difficult to get the blogging going.
I still spend as much time as I can working on projects, but I don't get them on my blog.
My God provides me with comfort and healing and gives me peace to get done what I can and let go of the things I can't.

Enough of that...I want to share this little card I made for my hubby.
I really like the way it turned out.
I wanted to use my cameo to cut out this great looking tree from their cut files. This is almost like a tree I have as a stamp from Hero Arts, that I bought a long time ago. I've always loved that tree but, being a stamp, I couldn't change the size AND it couldn't be used as a die.
I LOVE DIES!!!!


I had seen this technique on several blogs, where they cut two dies and inserted half of it into the negative space and then left the other half overlapping a different paper. I just loved the look of it and knew that the tree would be a perfect die to use.

The other thing I wanted to do was to hang a heart from the tree. I used thin twine. I just love how it hangs there and can be moved around freely. The heart I used was a heart leftover from a batch of clay embellishments I made one day. I'm running out of those and need to spend another day making up some items to use on my pages & cards. They're so nice to have because they add a different look. They are thicker and look different then the items I cut out of paper and I love to have them around. AND they cost just pennies as opposed to dollars that I would have to spend in the store.

Ok, so I chose an antique white Neenah paper to cut the tree out of.
I removed the tree from the paper and colored it with alcohol markers.
I cut the antique white paper down the middle of the tree and measured the placement on my card. I didn't want it right down the center of the card, so I kept it to the left. Then I found this gorgeous plaid paper and I adhered it to the card base to just match up to the cut on my base off-white cardstock.
Next, I took the off-white out and lined up the tree into the negative space. It was easier to put the tree back in with the paper out of the card...there was a little more wiggle room.

I adhered the off-white cardstock (with the tree in it), butting it right up next to the plaid. and the rest of the tree just laid right over that plaid paper.
Next, I tied the heart, and adhered the red nail heads. I love those. I don't see them around anymore, but they are really nice for a man's card.

Here's the challenges I have entered with this card
http://www.scrapitgirl.net/ Special  Birthday
http://www.dreamweaverstencils.blogspot.com/ something that flutters

We are still having very cold weather here in Michigan...but at least it's sunny now and feels better, even if it is in the single digits.
Hope your coming week is wonderful!
Be blessed,

e


Monday, January 27, 2014

Participating in the STENCILED class...


Hi there everybody,
I have been so blessed the last few days by participating in the online class: STENCILED. It is so good. Great teachers and such fun new ways to use stencils. I love stencils...but I have not used them nearly as much as I want to.

I tend to start my projects with a beautiful paper and I just didn't know how to incorporate stencils into my design. I see the addition of stencils on designer paper on other blogs that I read, but I was very unsure how to do it. Also, I would love to make some paper backgrounds, just to have some variety in my work.
I also had bought some Dreamweaver's stencil paste a couple of years ago and really wanted to start using it.

Well, this was the right class for me. Every project was done beautifully and opened up my mind to all kinds of possibilities. I AM SO EXCITED!!!! There are times in our journey when it's good to take a class just to get fresh ideas and wipe the dust off our thinking. I have a wall hanging that I made a while ago and it says:
                              ART wipes the dust
                               off everyday life

And I believe that wholeheartedly!!! We all need places in our journey where we
feel the glow of creativity that God has gifted us with. Our God is a creator and we are made in His image...we all need to create...in our own way, using our very own gifts.

So, here's a few of my creations that I am sharing in the class. This heart card has a stenciled heart behind the cut out hearts:

These next images are some of the tags I have been working on for my  Bible Study Group. I am very pleased with how they are turning out and I am finally using some of my Dreamweaver's paste on some of them.


First try ever for this technique!!! ...I used pearl paste on the stencil. Let it dry and then colored over with alcohol markers. Turned out very pearl shimmery. I love it! (This one is on my blog already)


I really like this one too!!! This is a stencil I bought years ago...and NEVER USED IT!!! and now I love it so much!!! Anyway, I colored in the stencil with my alcohol markers and then applied Glossy Accents over the top. What a great look...

I have much more work to do...I want to be sure to try out every one of their lessons to get the full impact of every technique. Stencils...YES I LOVE THEM!!!

Thanks for coming by,
Hugs,
Elena


Friday, January 24, 2014

My 2014 focus for my life: the Bible Love Chapter

Hello everyone out there in crafty land.

I am still up to my ears in bookmarks/tags and loving every moment. I'll bet by the time I'm done though, I'll be making anything BUT tags.
Right now though, it's really fun and I'm enjoying the different techniques and ideas that are rolling around in my head. There's still quite a few ideas that I want to do...so let's keep on going!!!

I like this particular bookmark because it turned out to be sort of vintage looking. The little light taupe rose and the bling flourish came from Prima and I found it in a scrapbook store. It was the only flourish with a flower, so I grabbed it as soon as I saw it. Hope I can find some more of these. They look so special with that little flower on them.

Most of the backgrounds for these bookmarks are cut from 8" designer paper packs. I love these packs. They seem to have better designs for cards, tags or small albums. I am one of those paper freaks that just can't walk away from a store without buying some paper.  Beautiful paper just gets my artsy juices flowing and wanting to go home and DO something!!!!!


So here's my tag...hope you like it as well as I do. It just makes me think of setting this bookmark in-between pages of a wonderful book being read to enjoy a quiet time and a beautiful story. Actually, mine would sit in a Beth Moore Bible Study book and I would be loving every moment I spent being with and talking to Jesus! What a great thought!!!

This tag background is Authentique paper pack.
The birdcage is stamped with VersaMark and embossed in gold.
The little bird is a punch from Stampin' Up that I bought ages ago and wouldn't      give it up for anything. I use it often. I understand they still sell it.
The little light taupe flower, crochet leaves and bling is from Prima and a new purchase.
The back of the tag is a printable from Pintarest and it is a copy of the 2Corinthians love chapter.

I am entering this into the http://flourishes.org/category/timeless-tuesday/Challenge. They want a celebration of something new: The love chapter is my focus for 2014.
It also fits into the http://divasbydesignchallenge.blogspot.ca/...which is anything goes. This is my first time in this challenge. I just found it. Glad I did!
Another challenge: http://greatimpressionsstamps.blogspot.com/search/label/Challenge
Something new here also...the Prima flower flourish is new.
http://wordartwednesday.blogspot.com/ Is my last challenge. They are always "Anything goes"...as long as it is uplifting.

Thank you so much for stopping by.
Hope you leave me a comment, I would love to hear from you.

Blessings to you and all those you love,

Elena

Friday, January 17, 2014

Lavender and Lace

Hello...
Hope you had a great week and are headed for even a better weekend.
I LOVE weekends. There's a lot to do, I know, but it feels like the choice of what you want to do is up to you, and I am always looking for some craft time. I have three day weekends and that is awesome...but it never feels like enough!!! There is so much I want to, I couldn't fit it all in no matter how much time I had. I'm sure most of you think that too.

Well anyway, I am still working on my 15 bookmarks. And still having fun. I'm the kind of a crafter that cannot make anything the same twice. Even though the backs have the same Bible passage, the fronts are all different. This time I used a flower stencil that I bought years ago and had never used, even though I really liked it. So, I traced it onto the front of my tag and colored it in with my Prismacolor alcohol ink markers. Then I covered it with Glossy Accents. That made the image just beautiful. Glossy, deep and rich in color. I loved it!!


The background was a paper with some pink, white and gray on it. It was a download, a long time ago, from Heidi Swapp. I added a pretty lavender color to the edges, lavender lace on the bottom and very light lavender gems to the flower.

I am pleased with the outcome. Hope all the gems stay in place if the bookmark is used a lot.

I am entering this tag into the
http://dreamweaverstencils.blogspot.com/ Lose the weight (CAS style)
http://www.greatimpressionsstamps.blogspot.com/ a new package of lace & matching bling
http://shellysimagesblog.blogspot.ca/ Out with the old, In with the new. The lace & matching bling is brand new.

That will do it for me.
Lots of  love and hugs...

Elena

Monday, January 13, 2014

It's 2014...

Hello everyone!!!

I am so glad to be back here on my blog, sharing a bookmark I made for my Bible Study Group for the new year. I am in the middle of creating a different bookmark for everyone. And the best part is, that it's a gift FOR ME!!! I get to try every kind of technique I have seen and never got around to do before. What fun!!! It's been just a wonderful way to get back in the groove. I am really enjoying doing tags because it's so much easier to try different techniques. I don't have to build a card around it. One image...one technique...and it's done. The back is the same for everyone. It's the love chapter in 2nd Corinthians.

WOW!!! I can't believe it has been 6 months since my last post. At first I couldn't write because we had a family emergency and all my extra time and energy went into helping my daughter and her family. They lost their home and moved in with us for a while and, on the one side, it was a LOT of FUN enjoying the grandkids...but on the other hand, there was a lot of emotional stuff going on with working out their situation. So it was a time I had to step back and put all my energy into every day "stuff".

Dealing with all that seemed to set me back and I took a lot of time to get back to crafting and enjoying my art. I am now in full swing and have been working like crazy all December and now, making cards and tags for all the people I had ignored for the past 6 months.


This bookmark I'm showing you today is my first try for this technique and so far, it is one of my favorites. I used a DDREAMWEAVER stencil http://www.dreamweaverstencils.blogspot.com/ that I have had for a long time and used before. It makes a beautiful image...even though I used only half of it because of the width of the tag.

I cut my bookmark (tag) from a tan and gold paper I had. I use a regular manila tag as my template for the size. The gold in the paper really sets off the flower design.

I used the Dreamweaver White Pearl Paste to apply the design to my tag. Dreamweaver has directions on how to paste your stencil design on to your paper and the design always comes out perfect.

After the paste was dry I "painted" on top of it with my Prismacolor alcohol markers. It turned out just beautiful. So shimmery because of the pearl paste. I had never used this technique before and am so pleased with it.

What a great way to give a different, pearly, shimmery look to your images.

So I am definitely entering this bookmark in the Dreamweaver challenge:
http://www.dreamweaverstencils.blogspot.com/ (my first time ever!)
Also to the Flourishes challenge http://flourishes.org/category/timeless-tuesday/
I LOVE their stamps. (first time ever for this challenge also!)
Also to the Word Art Wednesday because they are a Christian site and so very friendly. http://wordartwednesday.blogspot.com/
http://greatimpressionsstamps.blogspot.com/search/label/Challenge asks for something you had not used yet from your stash. I have had the pearl paste for a long time and had never used it before.
Another one: http://digitallysweetchallenges.blogspot.com/ anything goes
Last but not least: http://digisketchchallenge.blogspot.ca/2014/01/say-it-with-flowers.html say it with flowers

So this is enough for today. Back to making more bookmarks (I need 15 in two weeks...I can do it, I can do it, I can do it....)

Warm hugs
elena